Published Jul 1, 2024
Integration tiles: Best practices
Build integrations that are efficient, effective, easily maintainable, and scalable.

Building integrations goes beyond simply connecting systems; it’s about creating robust, enterprise-grade solutions that are efficient, maintainable, and scalable. That’s why we’ve established a set of best practices to help organizations leverage Celigo’s powerful integration platform, integrator.io, to transform complex networks into streamlined operations.
This article covers best practices, offering tips and guidance on how to design and implement integrations that adapt to changing needs and promote business success. Whether you’re starting a new integration project or optimizing an existing one, these best practices will help you achieve integration success.
Understanding the basics
When building integrations, it is important to organize them in a way that makes sense not only for you as the builder but also for your entire organization. This is where one should consider Conway’s Law. Conway’s law is a business concept that describes the link between organizations’ communication structures and the systems they design.
As this applies to the organizational structure in integrator.io, users should consider how their broader team will be able to identify new integrations by how they label them.
Integrator.io offers several different ways to label and add context to integrations. Before we discuss that topic, let’s first break down some of the terminology that Integrator.io uses to accomplish this.
Flow overview
A flow is a stream of data between two or more systems or applications. It exports data from one or more systems, processes it according to your settings, and imports the processed data into another system.

Integrations
An integration contains one or more flows set up to achieve your needs for manipulating and moving data between systems. An integration can refer to a single flow or a set of flows grouped together in a folder.
The container that organizes these flows is an integration, which is represented by a rectangular tile in the grid view or a specific row in the list view of the Home page.

You can group flows into integrations however you like. Click the integration in either the grid or list view to manage and monitor the flows within the integration.
If you want to organize your integrations according to best practices, you should organize them based on one (or more) separation methods:
By applications: Integrations that contain flows that are specific to the applications noted in the label of the integration (Integration Label: Salesforce to NetSuite).
By business process: Integrations with flows specific to a business process are designed to streamline operations through automation.
By department: Integrations that contain flows that are specific to the department that is benefiting from automation.
It is important to note that a combination of the methods above is fine so long as you are considering Conway’s Law first and foremost. Find an organizational methodology that works for you and always be consistent with it when building out new integrations.
Effective integration organization
Organizing your integrations with clear and purposeful labels is key to building a scalable and successful integrator.io environment. However, to make your integrations even easier to read and manage, you should also use features like integration flow grouping and integration settings.
These tools are especially useful for improving clarity and organization. Let’s take a look at each.
Flow groups
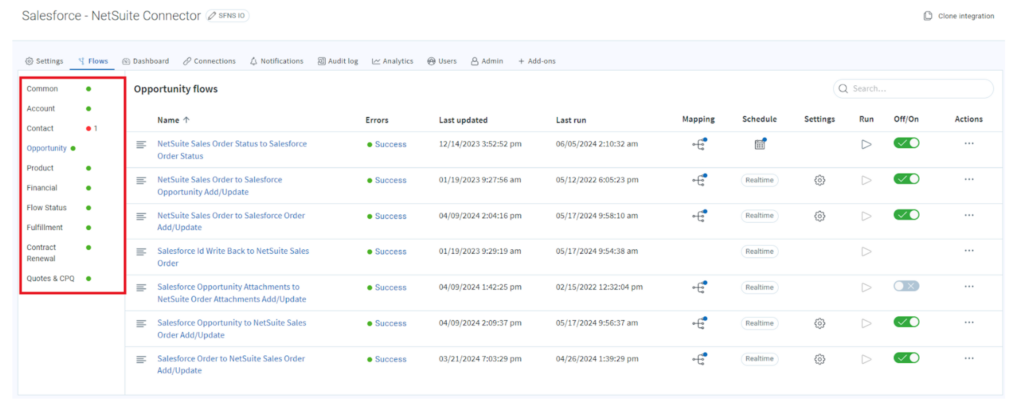
Flow groups allow you to organize flows within each integration more effectively. Each flow group acts as a subfolder where you can assign specific flows, preventing your integration from becoming cluttered and making it easier to locate the desired flow. We call this the “Kitchen Sink Scenario,” where the integration becomes an unorganized collection, much like the cabinet space under your kitchen sink.
To avoid the “Kitchen Sink Scenario,” we recommend following a best practice approach similar to labeling new integrations.
Segment your flows into groups that reflect the specific business processes they streamline. Additionally, take advantage of the ability to rearrange the order of flow groups within an integration. Organize them in a sequential structure that aligns with the records involved in each step of the business process you are automating.
For example, our Salesforce to NetSuite Integration Application arranges records involved in the quote-to-cash process into sequential flow groups.
By leveraging flow grouping and integration settings, you can significantly enhance the readability and maintainability of your integrator.io environment, ensuring efficient and effective integrations.

Integration settings
Another way to make your integrations user-friendly for non-technical team members is by setting up integration settings. These settings let you add extra attributes to resources, which can be used in the logic of your workflows.
To define these settings, you enter valid JSON objects into the Settings editor inside your integrations. For users unfamiliar with building JSON objects, integrator.io offers a library of JSON object examples in the developer playground within the form builder section.
Once your integration settings are configured, you can provide a user-friendly interface for business users. This interface enables quick and easy configuration changes at the integration level, eliminating the need to adjust each individual flow. This approach makes your integrations more accessible and manageable for non-technical team members, enhancing overall efficiency and ease of use.
Configuration settings: video walkthrough
Integration Lifecycle Management: Maintaining integrations for success
After following best practices for building integrations, the focus should shift to effectively maintaining these integrations.
Celigo’s Integration Lifecycle Management (ILM) functionality is designed to handle ongoing updates between sandbox and production environments.
Before exploring ILM features, it’s important to understand the benefits of using both sandbox and production environments for ongoing integration development.
Making changes directly within your production integrations can be tempting but risky. Potential issues include test data mixing with live data, other integrations picking up test records, and inconsistent data affecting reporting and analytics, leading to incorrect business decisions.
To manage integration development effectively, follow these best practices:
- Initial development: Start development with connections to the sandbox instances of the applications involved in the project.
- Deployment to production: When ready for deployment, clone the integration to the production integrator.io environment and establish connections to the applications’ production versions.
- Ongoing updates: Manage updates in the sandbox instance of integrator.io. Since the sandbox integration was cloned to production, there is a link between the two versions. This link allows full control over pushing updates to production from the sandbox and the ability to revert to previous versions if needed.
Manage integrations with ILM

For additional information on our integration lifecycle management (ILM), please review this article from our help center.
Additional best practices
Some additional best practices to keep in mind when building integrations on integrator.io are as follows:
1. Minimize one-to-many relationships between sandbox and production integration tiles.
-
- A one-to-many relationship is possible to configure between sandbox and production integrations.
- These should be avoided if possible to reduce the chance of any merge conflicts that may arise due to production tiles eventually falling out of sync with their initial sandbox version.
ILM: Manage multiple integrations from the template

2. Avoid managing updates to integrations within your production systems.
- While integrator.io can support pushing updates from production to sandbox, it is never recommended. For reasons why developing out-of-production systems is not advised, please refer back to the “Maintaining integrations for success” section of this article.
3. Provide integration descriptions to set your organization up for success.
- One can never know with 100% certainty how many people from their organization may need/want access to their integrator.io environment in the future. Be sure to provide descriptions to your integrator.io tiles so that everyone within your organization can clearly understand the purpose of the integration you have set up.
Building efficient, maintainable, and scalable integrations
This article provides a comprehensive overview of best practices for integrations and emphasizes readability, organizational structure, and maintenance strategies. By following these guidelines, businesses can build integrations that are efficient, effective, easily maintainable, and scalable.
These best practices ensure smoother integration processes and better outcomes. From structuring integrations for readability to utilizing sandbox environments and integration lifecycle management for seamless development and deployment, these best practices ensure smoother integration processes and better outcomes.
As technology landscapes continue to evolve, embracing these principles will be instrumental in driving successful integration initiatives and maximizing Celigo’s value for organizations of all sizes and industries.

