Published Jun 14, 2024
How to automate lead syncing in Google Sheets
With Celigo’s Google Sheets connector, your spreadsheets can become dynamic tools, reading and writing data across your business tech stack. In a previous article, we demo how Google Sheets can intelligently communicate with your CRM, streamlining record entries and updates.
Here, we’ll demonstrate how a spreadsheet can go from a shared note-taking tool to a shortcut for synchronizing your leads into your CRM with a flow.
Imagine you’re a Business Development Representative at a conference, capturing leads in a Google Sheet. You want to quickly add these leads to your CRM without manual entry, allowing sales reps to follow up immediately.
A flow using the Google Sheets connector will allow you to achieve this outcome quickly. The latest enhancements to this connector allow you to format spreadsheet data with headers and use pre-set template flows for easy automation between your CRM and Google Sheets.
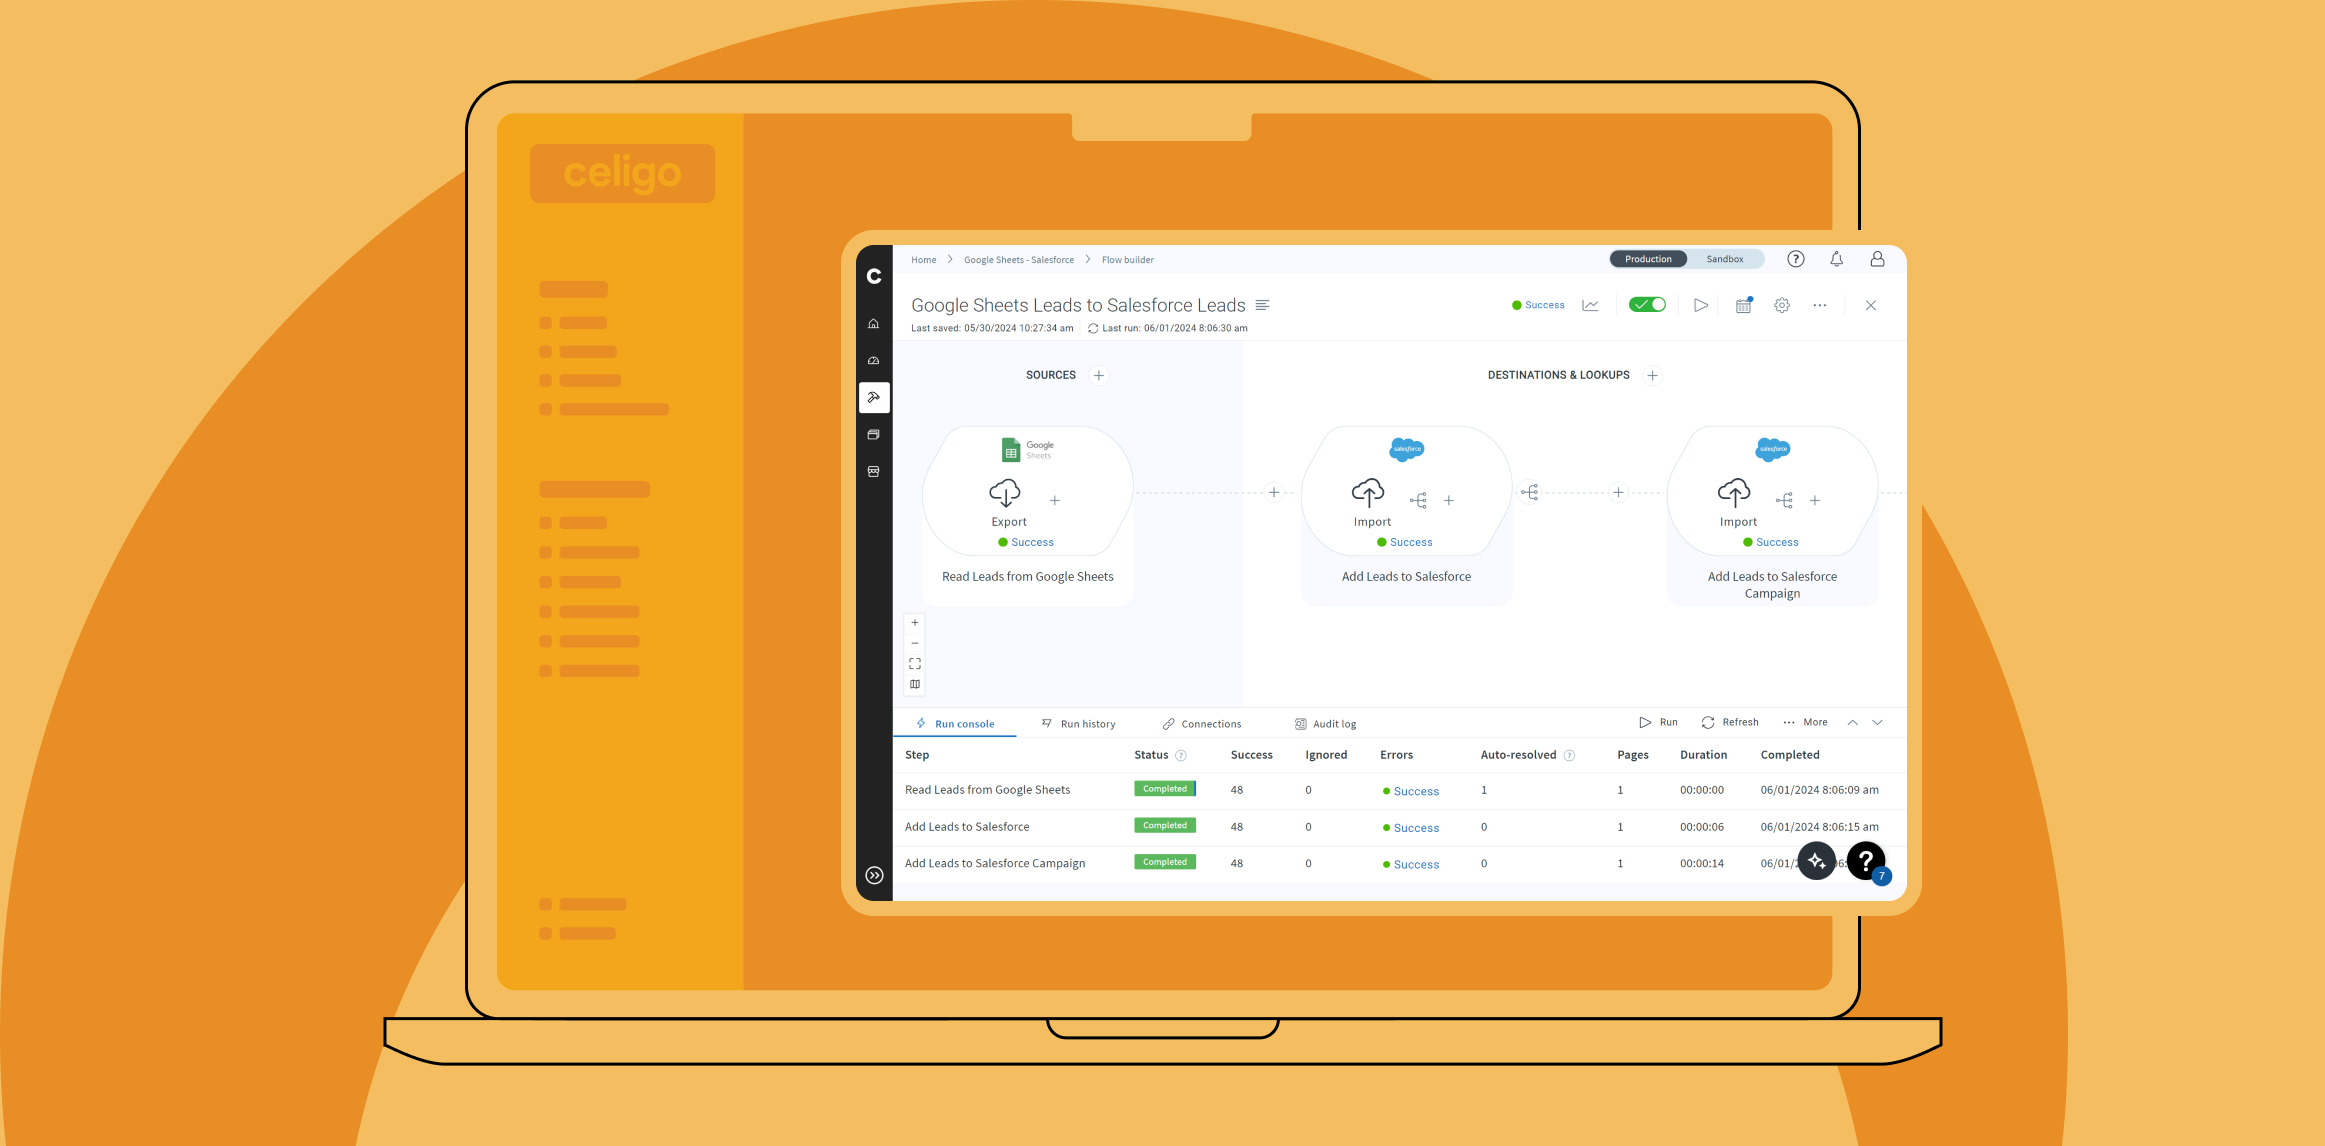
We will examine a flow that solves this issue to demonstrate the use of the Google Sheets connector in practice. For this example, we used Salesforce as our CRM and a Salesforce campaign called “Tech Conference – Houston.” We’ll explore how this flow works, focusing on getting a Google Sheets export up and running. Once we’ve established a proper connection and export configuration, we’ll examine mapping that data properly.
Before you start a flow, it’s always a good idea to leverage what you already have. Celigo’s Integration Marketplace offers preconfigured templates with flow steps and is a great way to get a headstart on building a flow with a common use case.
Google Sheets video walkthrough
Explore the features and new enhancements of our Google Sheets connector in this video walkthrough.
Using the Marketplace to Streamline Work
When you click ‘Create Source’ to start building a new flow and search for the app of your choice, you will receive suggestions for existing flow steps and flow steps from Celigo’s Marketplace based on your application.
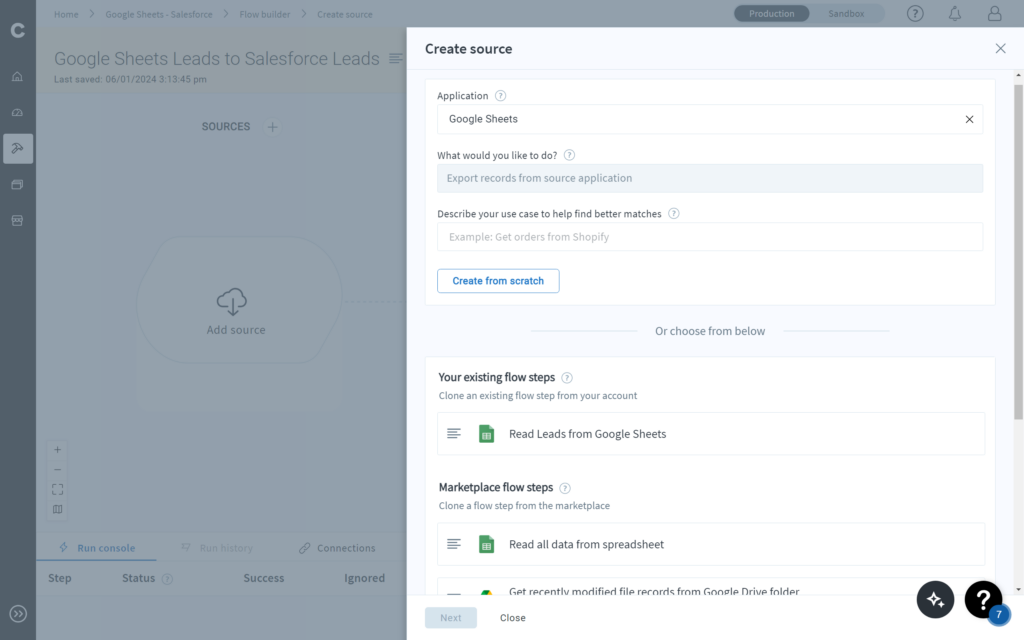
One of the Marketplace steps available for download is called “Read all data from a spreadsheet.” This prebuilt step is perfect for our needs and saves time. If you plan to read data from a spreadsheet, start here. Next, we’ll explore the information required to configure the connector after using this Marketplace step.
Creating a Google Sheets connection
Starting with this cloned step will preconfigure the resource, API endpoint, and check the “First Record Contains Headers” box. This is crucial if your spreadsheet has column names. With the Google Sheets connector, each row becomes a record, and the column names will match the corresponding values.
Name this step and create a connection to your Google Sheets environment. Click ‘Create Connection,’ name your connection, and configure the scopes. This setup ensures your flow understands your spreadsheets without complex business logic.

Creating a flow that solves our problem only requires reading from a spreadsheet so we’ll check the ‘readonly’ scope, press the ‘>’ button to move the selected scope over to right side, then save this configuration. Now we’ll be prompted to select the Google account we wish to connect to and allow the permissions integrator.io needs to connect to our environment. Once you’ve selected your account and acknowledged these permissions your connection is complete.
Add your spreadsheet ID
The next field to fill out is the “Spreadsheet ID.” The help bubble beside this field will instruct us how to retrieve this information.

After navigating to the desired Google Sheet, copy and paste the ID into the specified field. Then, check the final box to complete the setup.
Enter the range
The Range box asks for the name of the spreadsheet you want to access. After entering the ID for your spreadsheet project, you still need to indicate which spreadsheet you want to use. For example, you may have renamed your spreadsheet from “Sheet1” to something more descriptive. You may have multiple sheets involved in the project named “Sheet1”, “Sheet2”, “Sheet3”, and so on. To clarify which spreadsheet you want to use, place the name of the sheet you’re targeting into this field. You may also target specific cells, rows, or columns using more in-depth Google Sheets’ A1 notation if you’d like.
If you’ve created your connection, entered the ID from your spreadsheet URL, and specified the spreadsheet name, you can hit preview and see each spreadsheet row come through like a record from any other business application.
That’s all you need to take data from your spreadsheets and into your flows!
Using exported spreadsheet data
In the second step, we configure an import to create Leads in Salesforce. This is all standard and has more to do with Salesforce than Google Sheets. However, there is an important distinction when it comes to mapping.
Recall that when the “First record contains headers” checkbox is active, the column names in your spreadsheet will be applied to the corresponding fields of each record. You should be able to select your fields from a list of suggested fields once you begin mapping source fields. However, if one or more of your Google Sheets fields do not appear as suggestions, you can access them using handlebars and get the same results.
Below is an example. The rest of the fields are mapped normally, while the Notes field is mapped using handlebars. Either approach will get the same results.
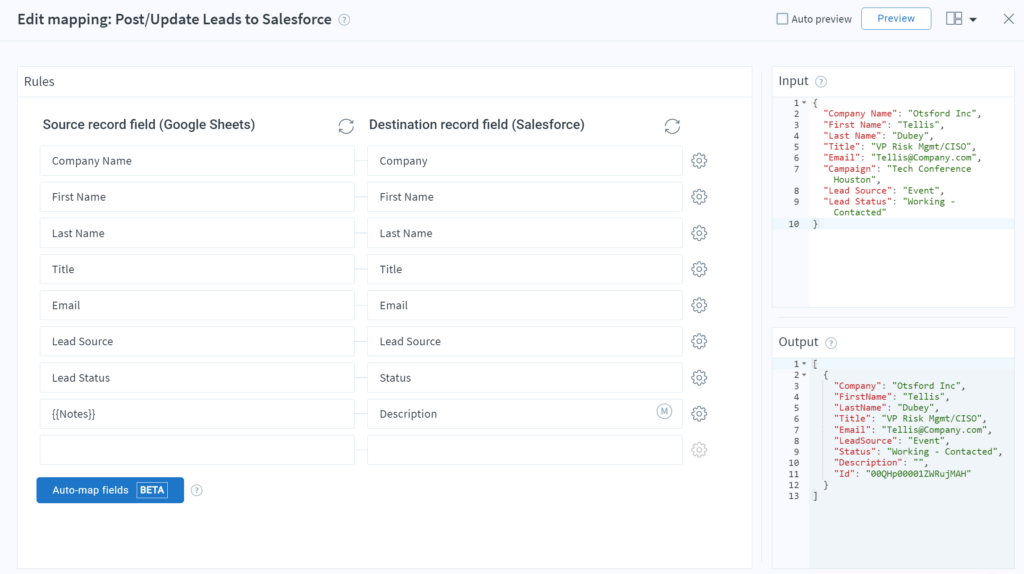
Once this is complete, we use response mapping to capture the ID of any leads that were created or found to already exist. This is then used in the final step to create a Campaign Member Salesforce object between each Lead ID and the Salesforce campaign (whose ID is entered with hardcoded mapping).
We set this flow to run on a scheduled basis, but after a manual trial, it’s clear everything has worked! Rather than individually creating all of these leads after a long conference, this spreadsheet has become a dynamic notebook capable of updating our CRM automatically.
Let’s get started
With Google Sheets integrations, you can enhance data management and boost real-time analytics, enabling more accurate and efficient workflows across your organization.
Already a user? Install the template
Integration insights
Expand your knowledge on all things integration and automation. Explore our resources, learn from experts, and elevate your building expertise.


