Published Mar 11, 2025
How to automate ServiceNow Asset tracking in Google Sheets

Managing your company’s tech assets efficiently is vital to internal IT operations. The complexity grows as organizations expand, with records on assets such as laptops, software licenses, and network equipment often scattered across different systems and provisioned across different departments.
For the head of an internal tech team, ensuring these assets are documented, tracked, and easily accessible in one central location is essential to maintain a smooth and efficient provisioning process.
Here, we’ll examine a flow in Celigo’s integration platform that automates the synchronization of tech asset data from your systems to a centralized Google Sheets spreadsheet. This integration creates visibility into internal tech inventory, improves asset tracking, and streamlines the asset provisioning process.
Flow demo
Centralizing asset management
Let’s consider a scenario in which you are the head of your company’s internal tech team. Your team manages tech assets in ServiceNow, and you rely on spreadsheets as an accessible, license-free, and centralized place to track and share that data.
Whether it’s hardware, software licenses, or cloud subscriptions, having everything documented in one place allows for more well-informed, responsive decision-making surrounding procurement, provisioning, incident response, and more.
This is where a simple but effective integration can solve the problem. By syncing data between your asset management system and Google Sheets, you ensure that your asset list is always current, accessible, and easy to manage.
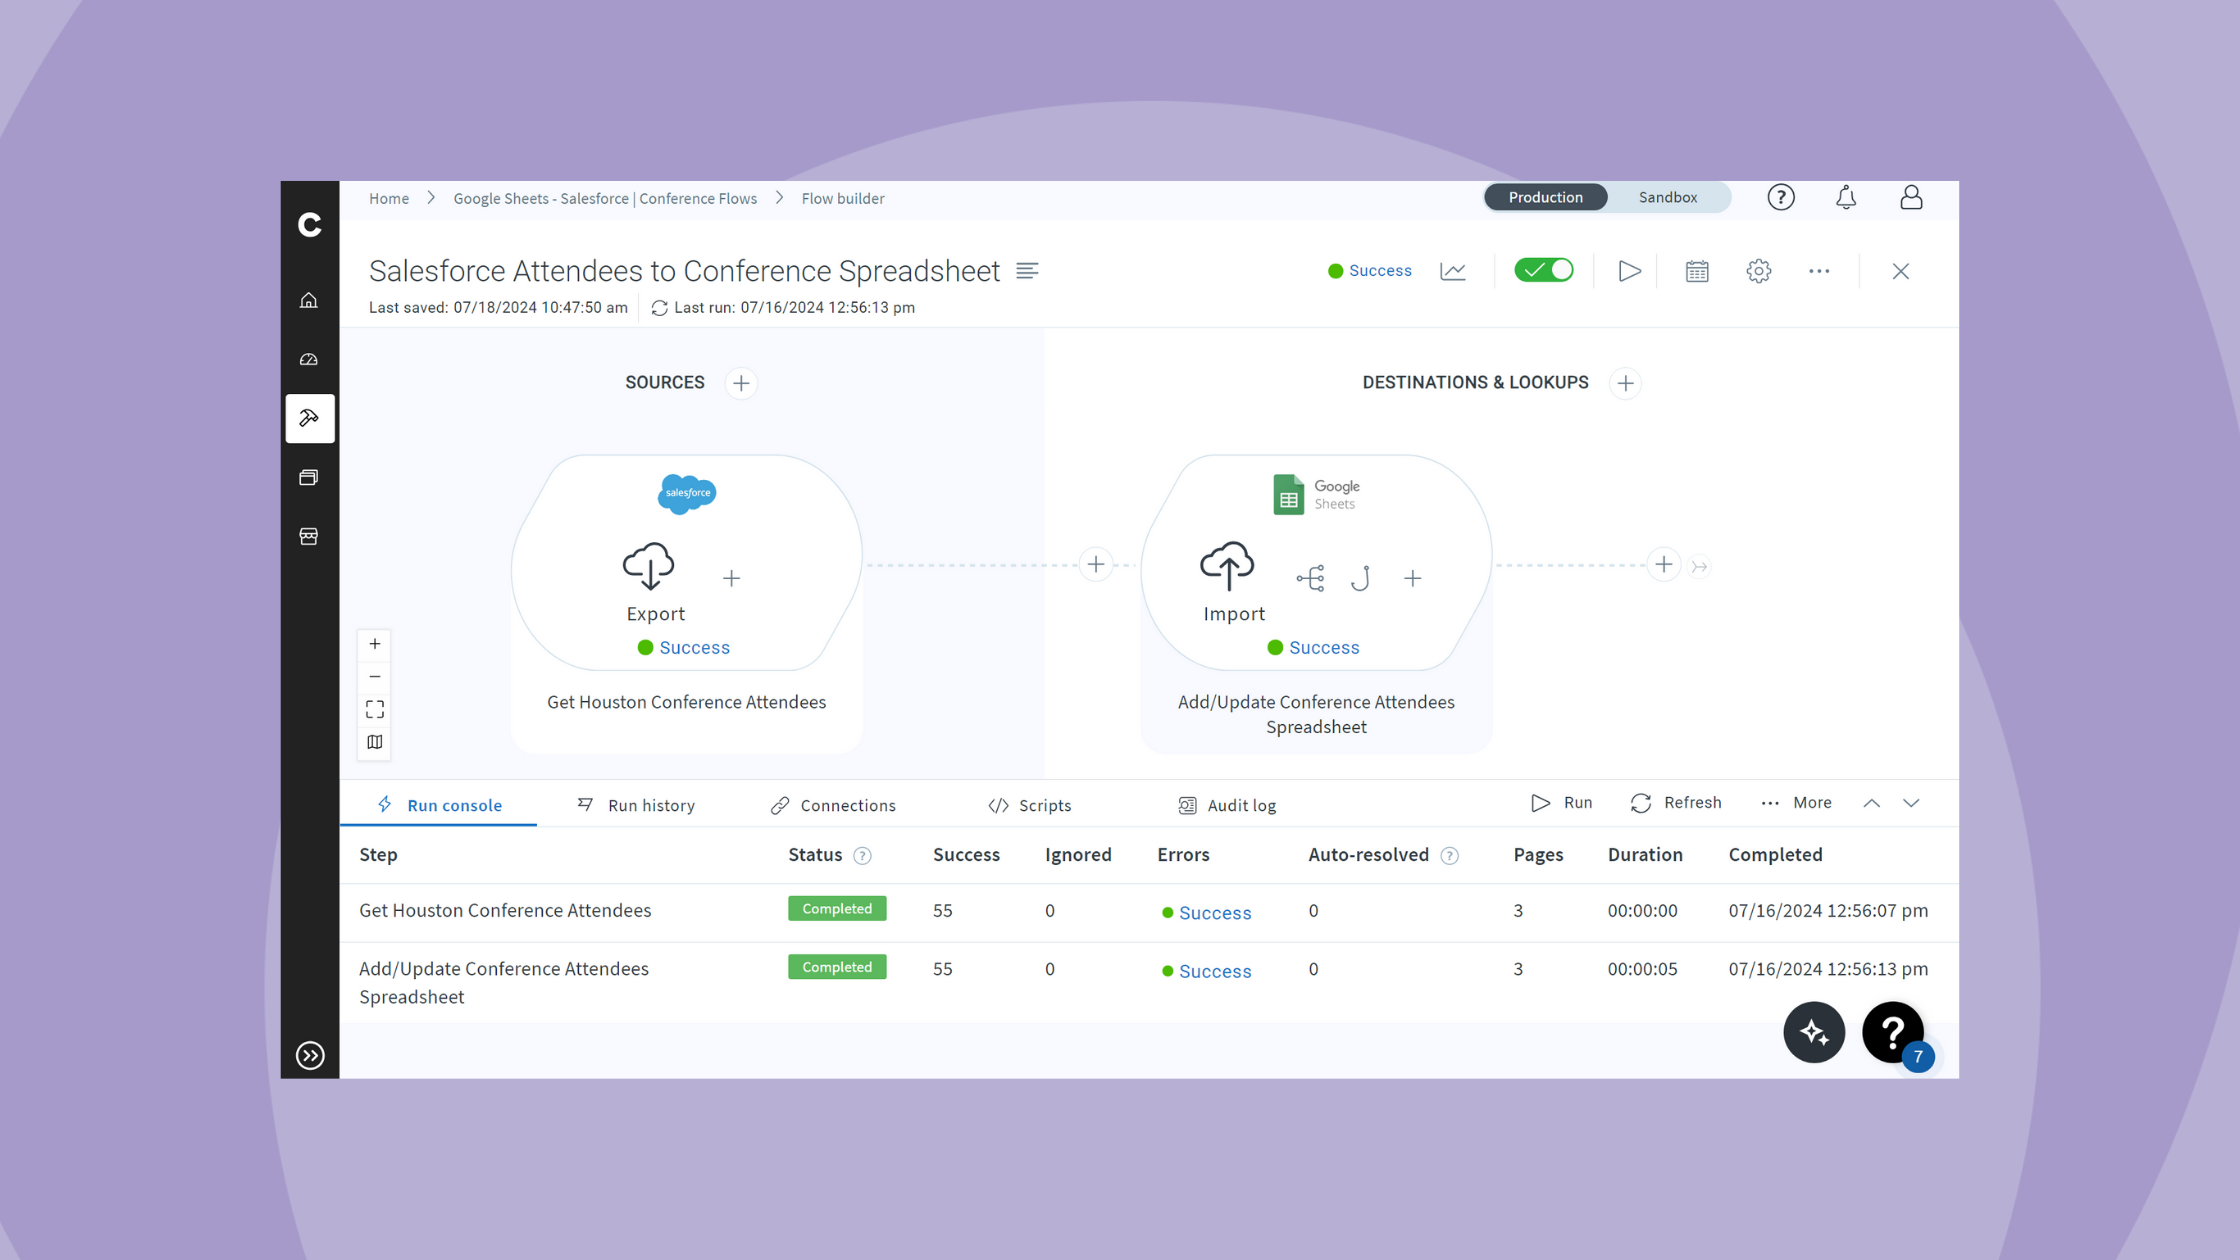
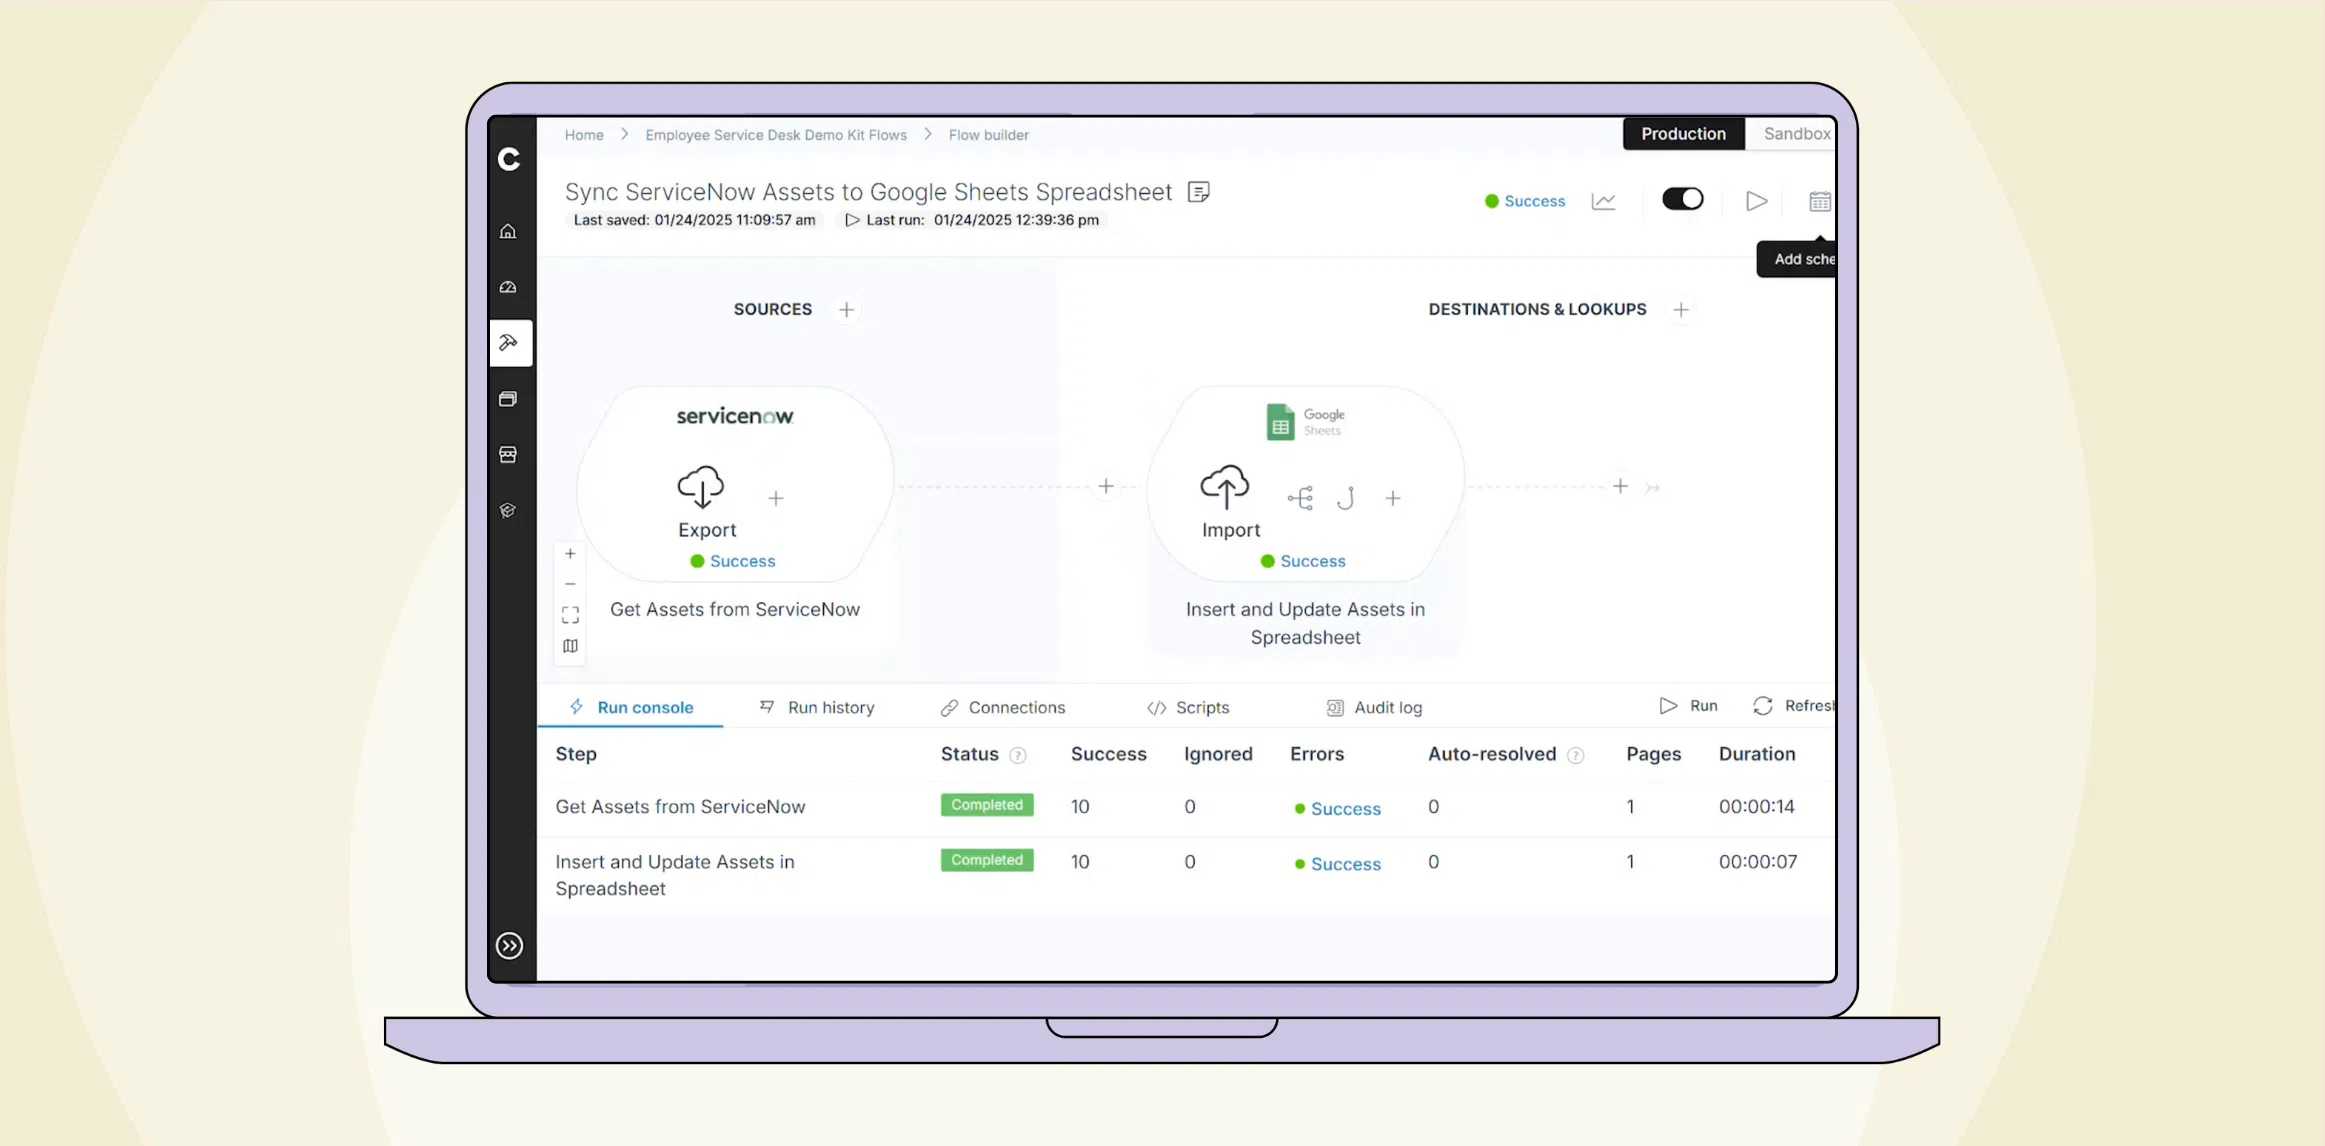
ServiceNow assets to Google Sheets spreadsheet flow

This flow will simply take assets from ServiceNow on a scheduled basis. In the first step, the flow will retrieve assets from the Assets table in ServiceNow and add them to the source data. This data will then be sent to the second step, where the flow will add new assets and update old ones according to the specifically chosen columns in a spreadsheet.
Let’s look closer at the configuration of the first step.
Flow step 1: Get Assets from ServiceNow
The ServiceNow Tables API allows us to access tables of records. By examining the different tables available under the Tables section of ServiceNow, we can see that ServiceNow refers to the system’s table of assets as “alm_asset.”

Using this information, we can configure the first step of the flow to export assets.

We’ll select the Table API as our resource to access tables of records. Next, we’ll specify that we want to retrieve records from a table. Finally, we’ll specify the table by name.
The name for the ServiceNow table of assets is “alm_asset” so we’ll enter that in exactly as it appears in ServiceNow.
Two query parameters may be added by default to the configuration of this step. “Sysparm_display_value” is used to specify whether reference fields should return their display value or system id. “Sysparm_exclude_reference_link” can be used to specify if records should return links to the referenced record.
The Asset table doesn’t extend to any other table so no referenced fields can be expected. Because of this, the values for these query parameters don’t matter in this case, and can be removed or left alone.
Now, we can configure the export type of this flow.

A Limit type was used in this flow for testing purposes, limiting the process to only 100 records (assets in this case). In practicality, a “Delta” flow will usually be the most ideal export type. With this type of flow, default behavior allows the flow to keep a record of the last time each record was sent.
If data for a record has changed since the last time the flow ran, the record will be processed again to keep pace with the changes. Otherwise, unchanged records will be left alone.
This reduces the redundant processing of unchanged records. If only three of your 500 assets have changed since the flow last ran, the flow will only process three records.
Flow step 2: Insert and Update Assets in Spreadsheet
The first step of the flow so far exports data on our Assets in ServiceNow. Next, a Sheets import step will add that data to an empty spreadsheet with Column Headers. Here is what our spreadsheet might look like to start with, along with some pointers to helpful information when integrating with Google Sheets.
![]()
We have column headers for different aspects of each Asset that will be written to the spreadsheet. Depending on your needs, you can have as many or as few columns of information per Asset as you will need.
Before we begin configuration, let’s look at the two bits of information identified in the screenshot above:
- Spreadsheet Id: The spreadsheet ID is a unique string of letters and numbers that will be used to identify the spreadsheet you would like to work with.
- Spreadsheet Name: In your Google worksheet, you may have multiple tabs with various names. By default, the name of the first tab created is ‘Sheet1’ but can be rewritten. This name will be used along with the spreadsheet Id to identify the tab in your worksheet that will be affected by your flow.
Now that we understand some important identifying features of our Spreadsheet, let’s create the flow step.
For a more streamlined approach, a template step can be used here. Templates are free-to-download flow steps prebuilt by the Celigo team. While creating a Google Sheets import step, scroll down to see available marketplace steps for your selected application. We’ll use the “Update existing rows and append new rows” template step to get started. You can learn more about this Google Sheets template step and similar Marketplace steps here.

Once we’ve downloaded that flow step from the marketplace, named our step, and connected, we’ll need to configure the settings.
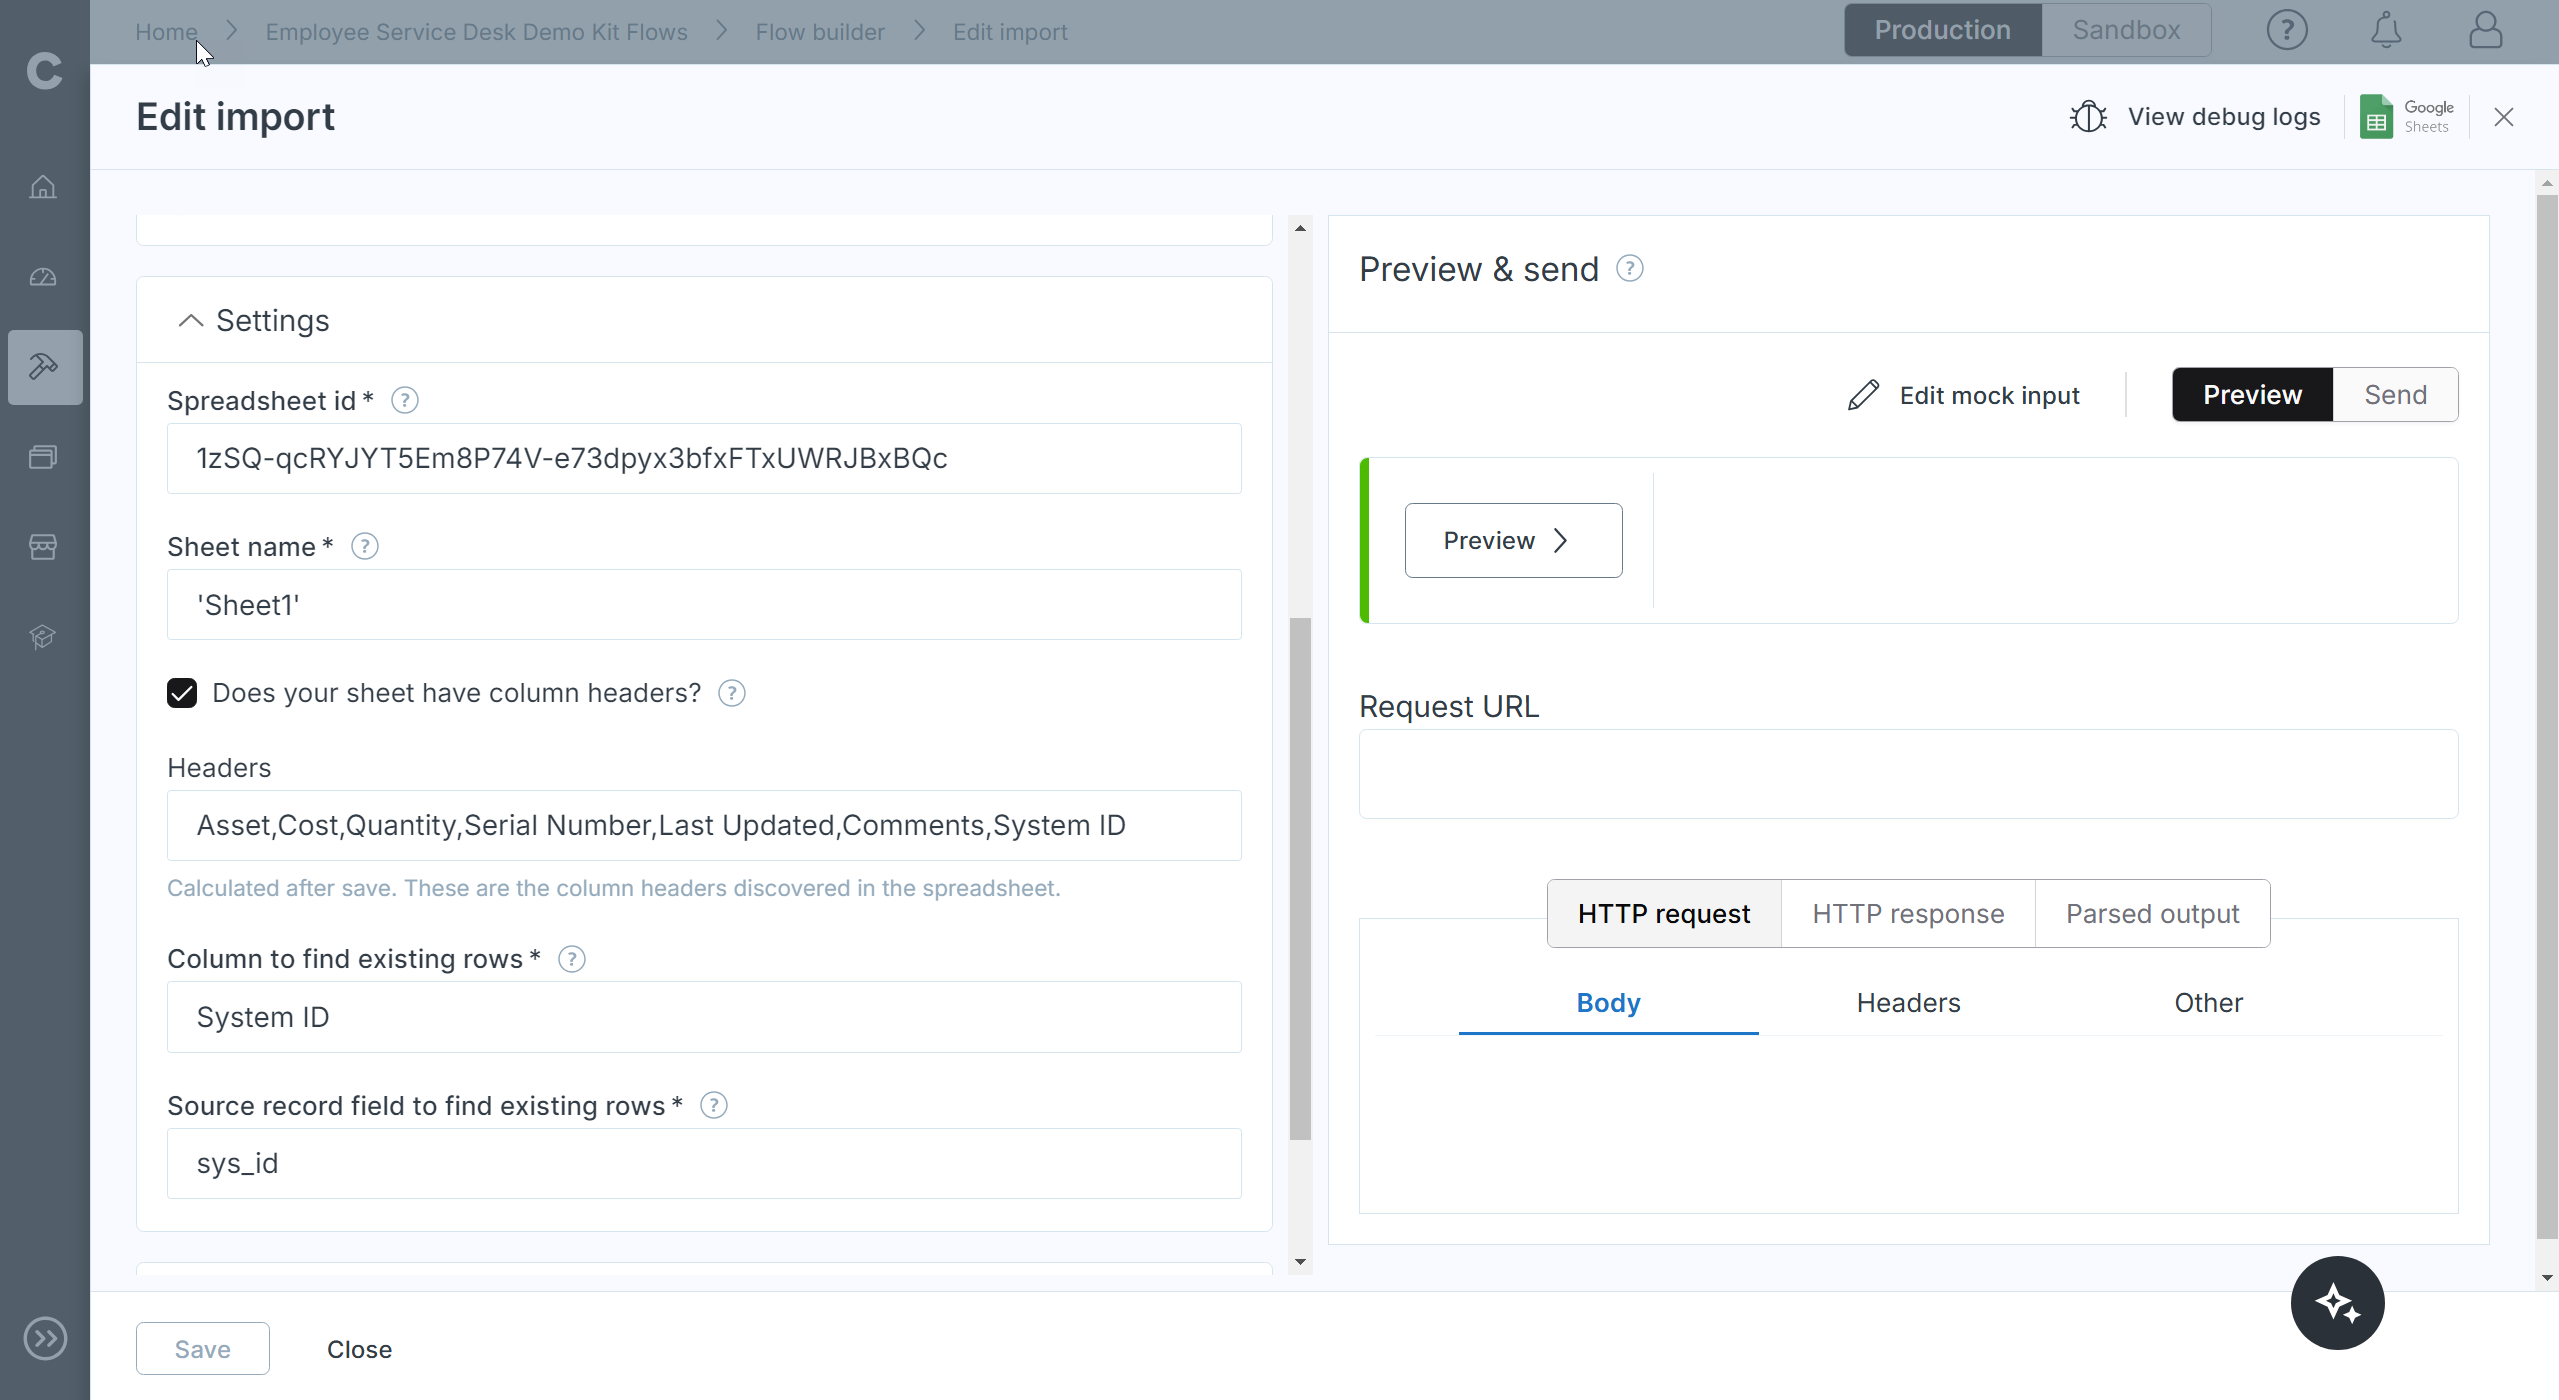
This is where we supply the spreadsheet’s Id and name. Since our spreadsheet uses headers, we’ll mark the headers checkbox. The box for Headers will be populated on its own.
Finally, we need to find a way to link the incoming data from ServiceNow with the data present in our spreadsheet. This is where having a column for the record’s internal ID comes in handy. The System ID column will store the unique, internal ID of each asset by mapping this column to the source field ‘sys_id’. If the system Id an asset matches the System ID column of a row already in the spreadsheet, then that existing asset will simply be updated. If no match is found for an incoming record’s Id, the asset is new to the spreadsheet and will be added in a new row.
Import mapping
Our flow is nearly complete. We only need to configure the mapping of this step. Mapping can be thought of as picking the fields you want to use from the earlier steps in the flow and assigning them to their proper place in the destination application.
In this case, it means taking fields from Assets exported from ServiceNow and putting them in their proper columns, where each row represents an Asset. The complete mapping below demonstrates this.
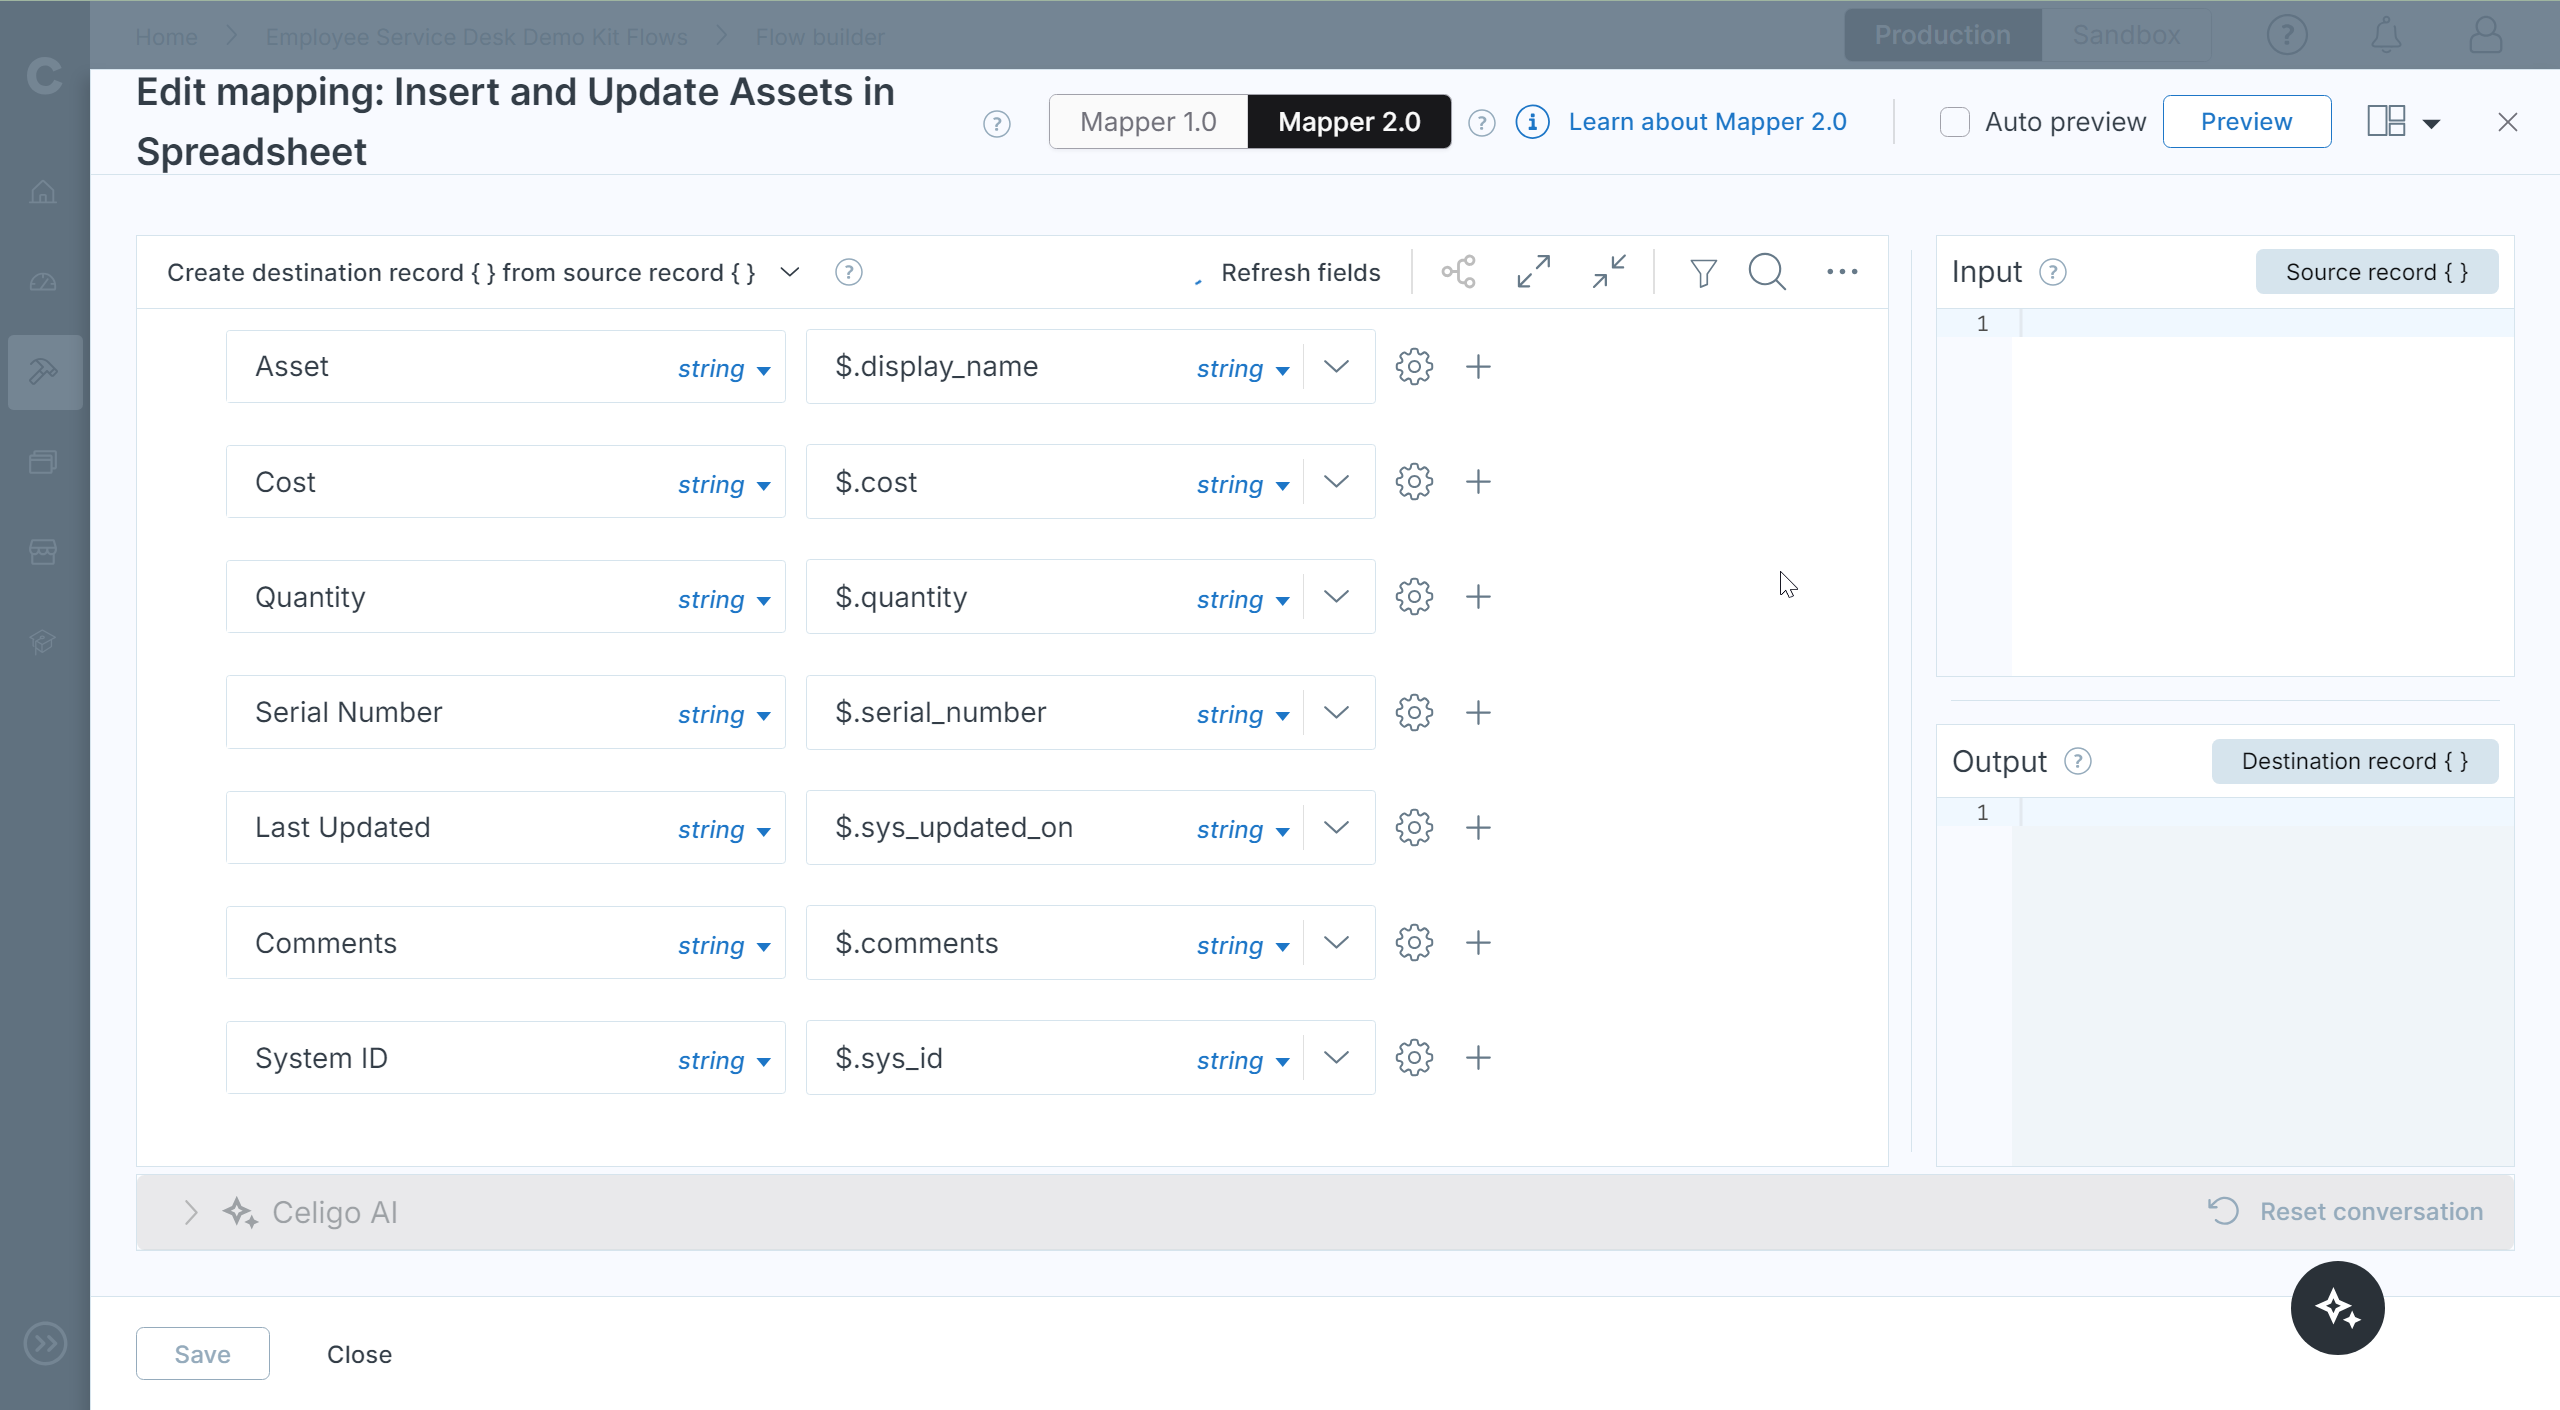
On the left, we have columns from our Spreadsheet. On the right, we choose from an automatically populated dropdown menu the field whose value we want to appear in that column.
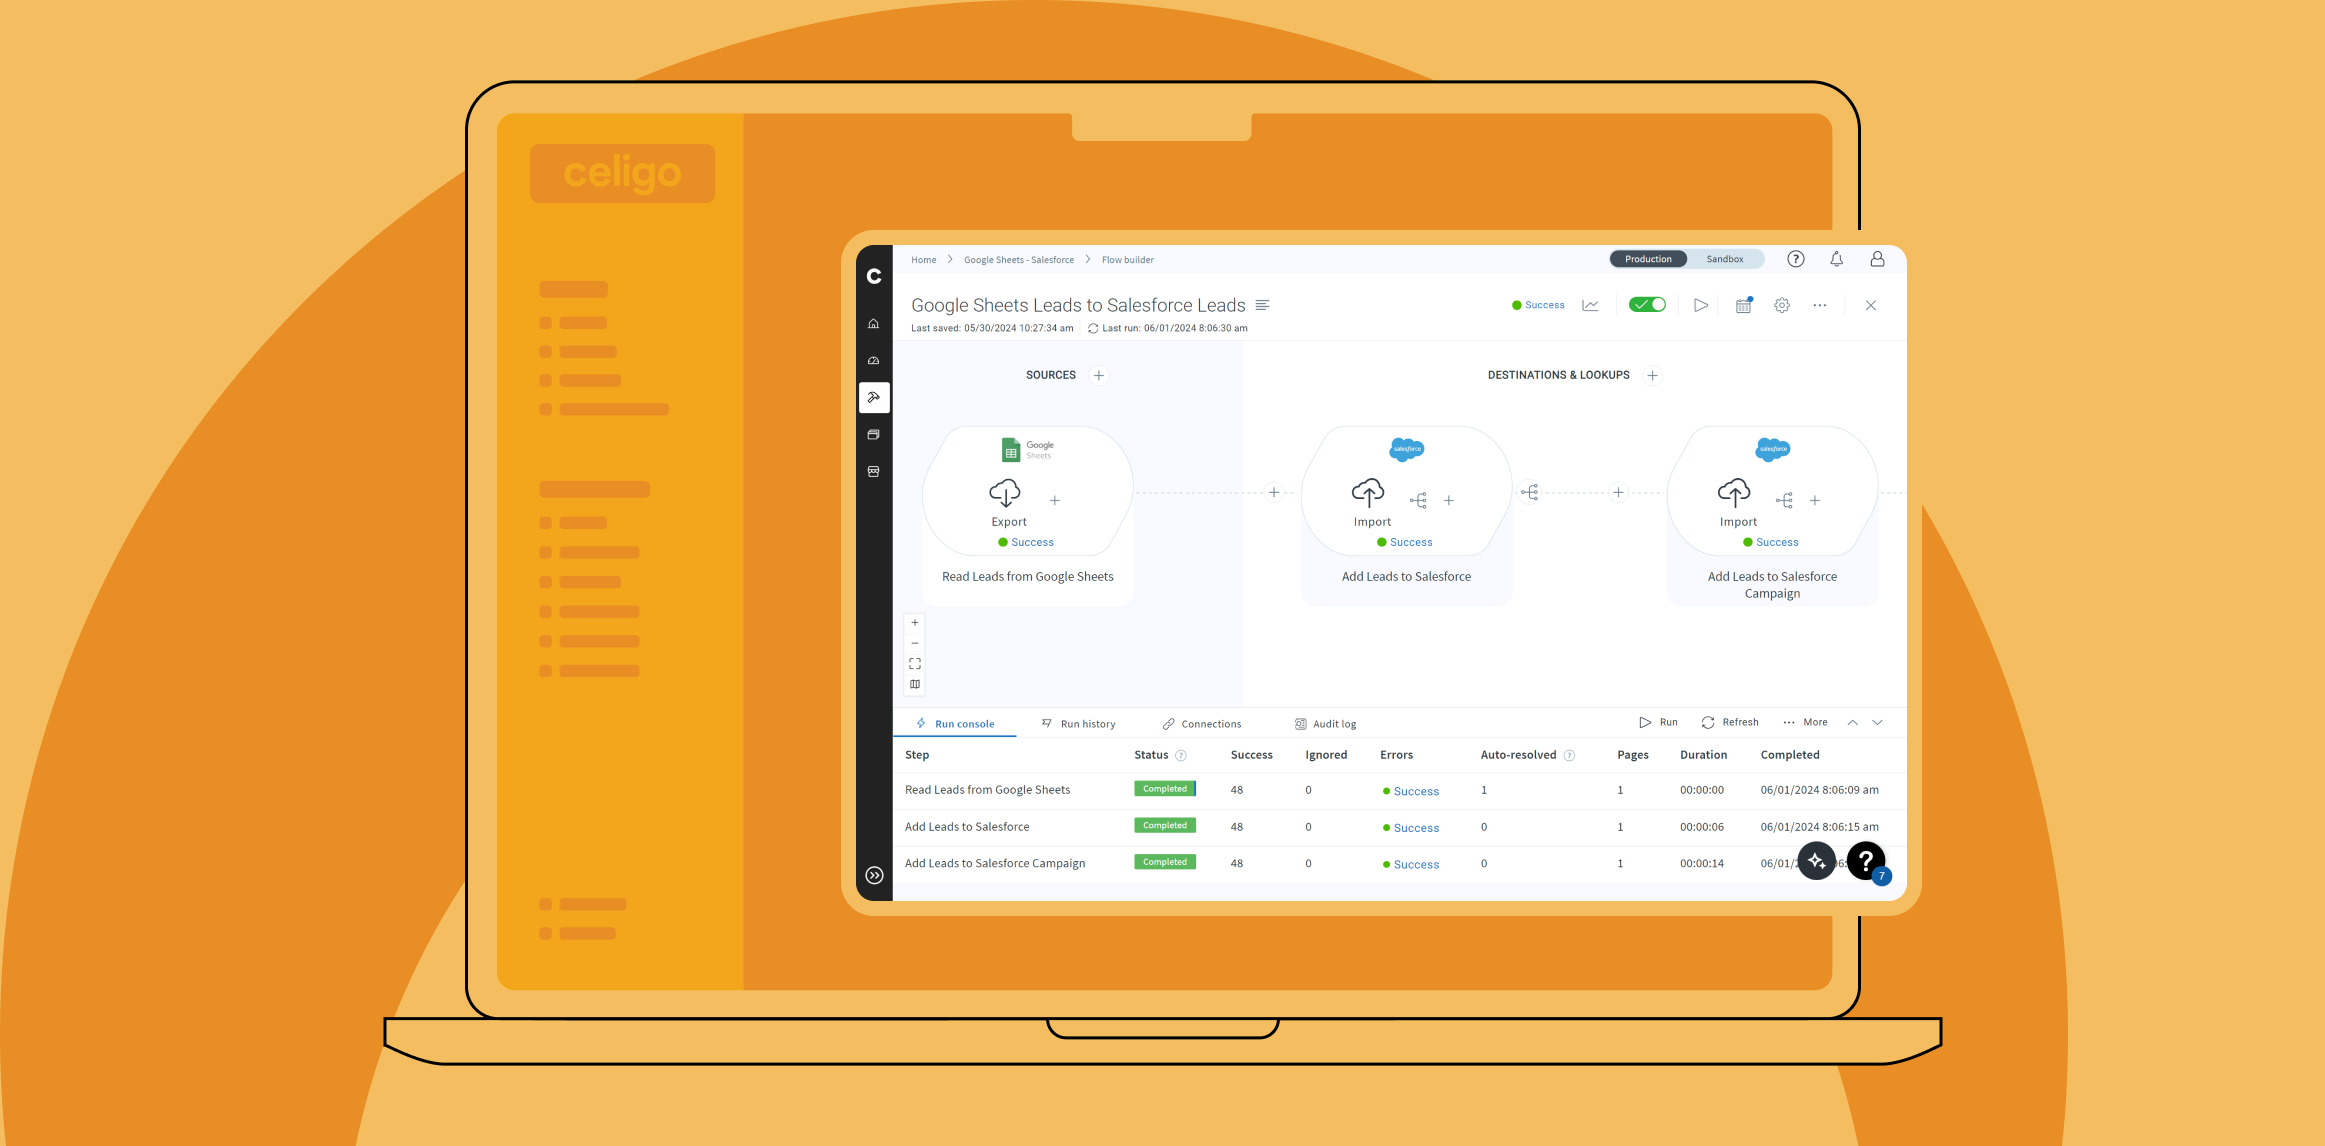
Running the complete flow
The flow steps are configured, and the mapping for the import step is complete. Our flow is now ready to run. We’ll manually run it by taking it out of test mode via the toggle switch at the top right and clicking the run button.
The run console shows us in real-time which records are successfully passing through each step and which may cause errors that need further review. Once the flow is complete, our spreadsheet should be fully populated and will look something like this.

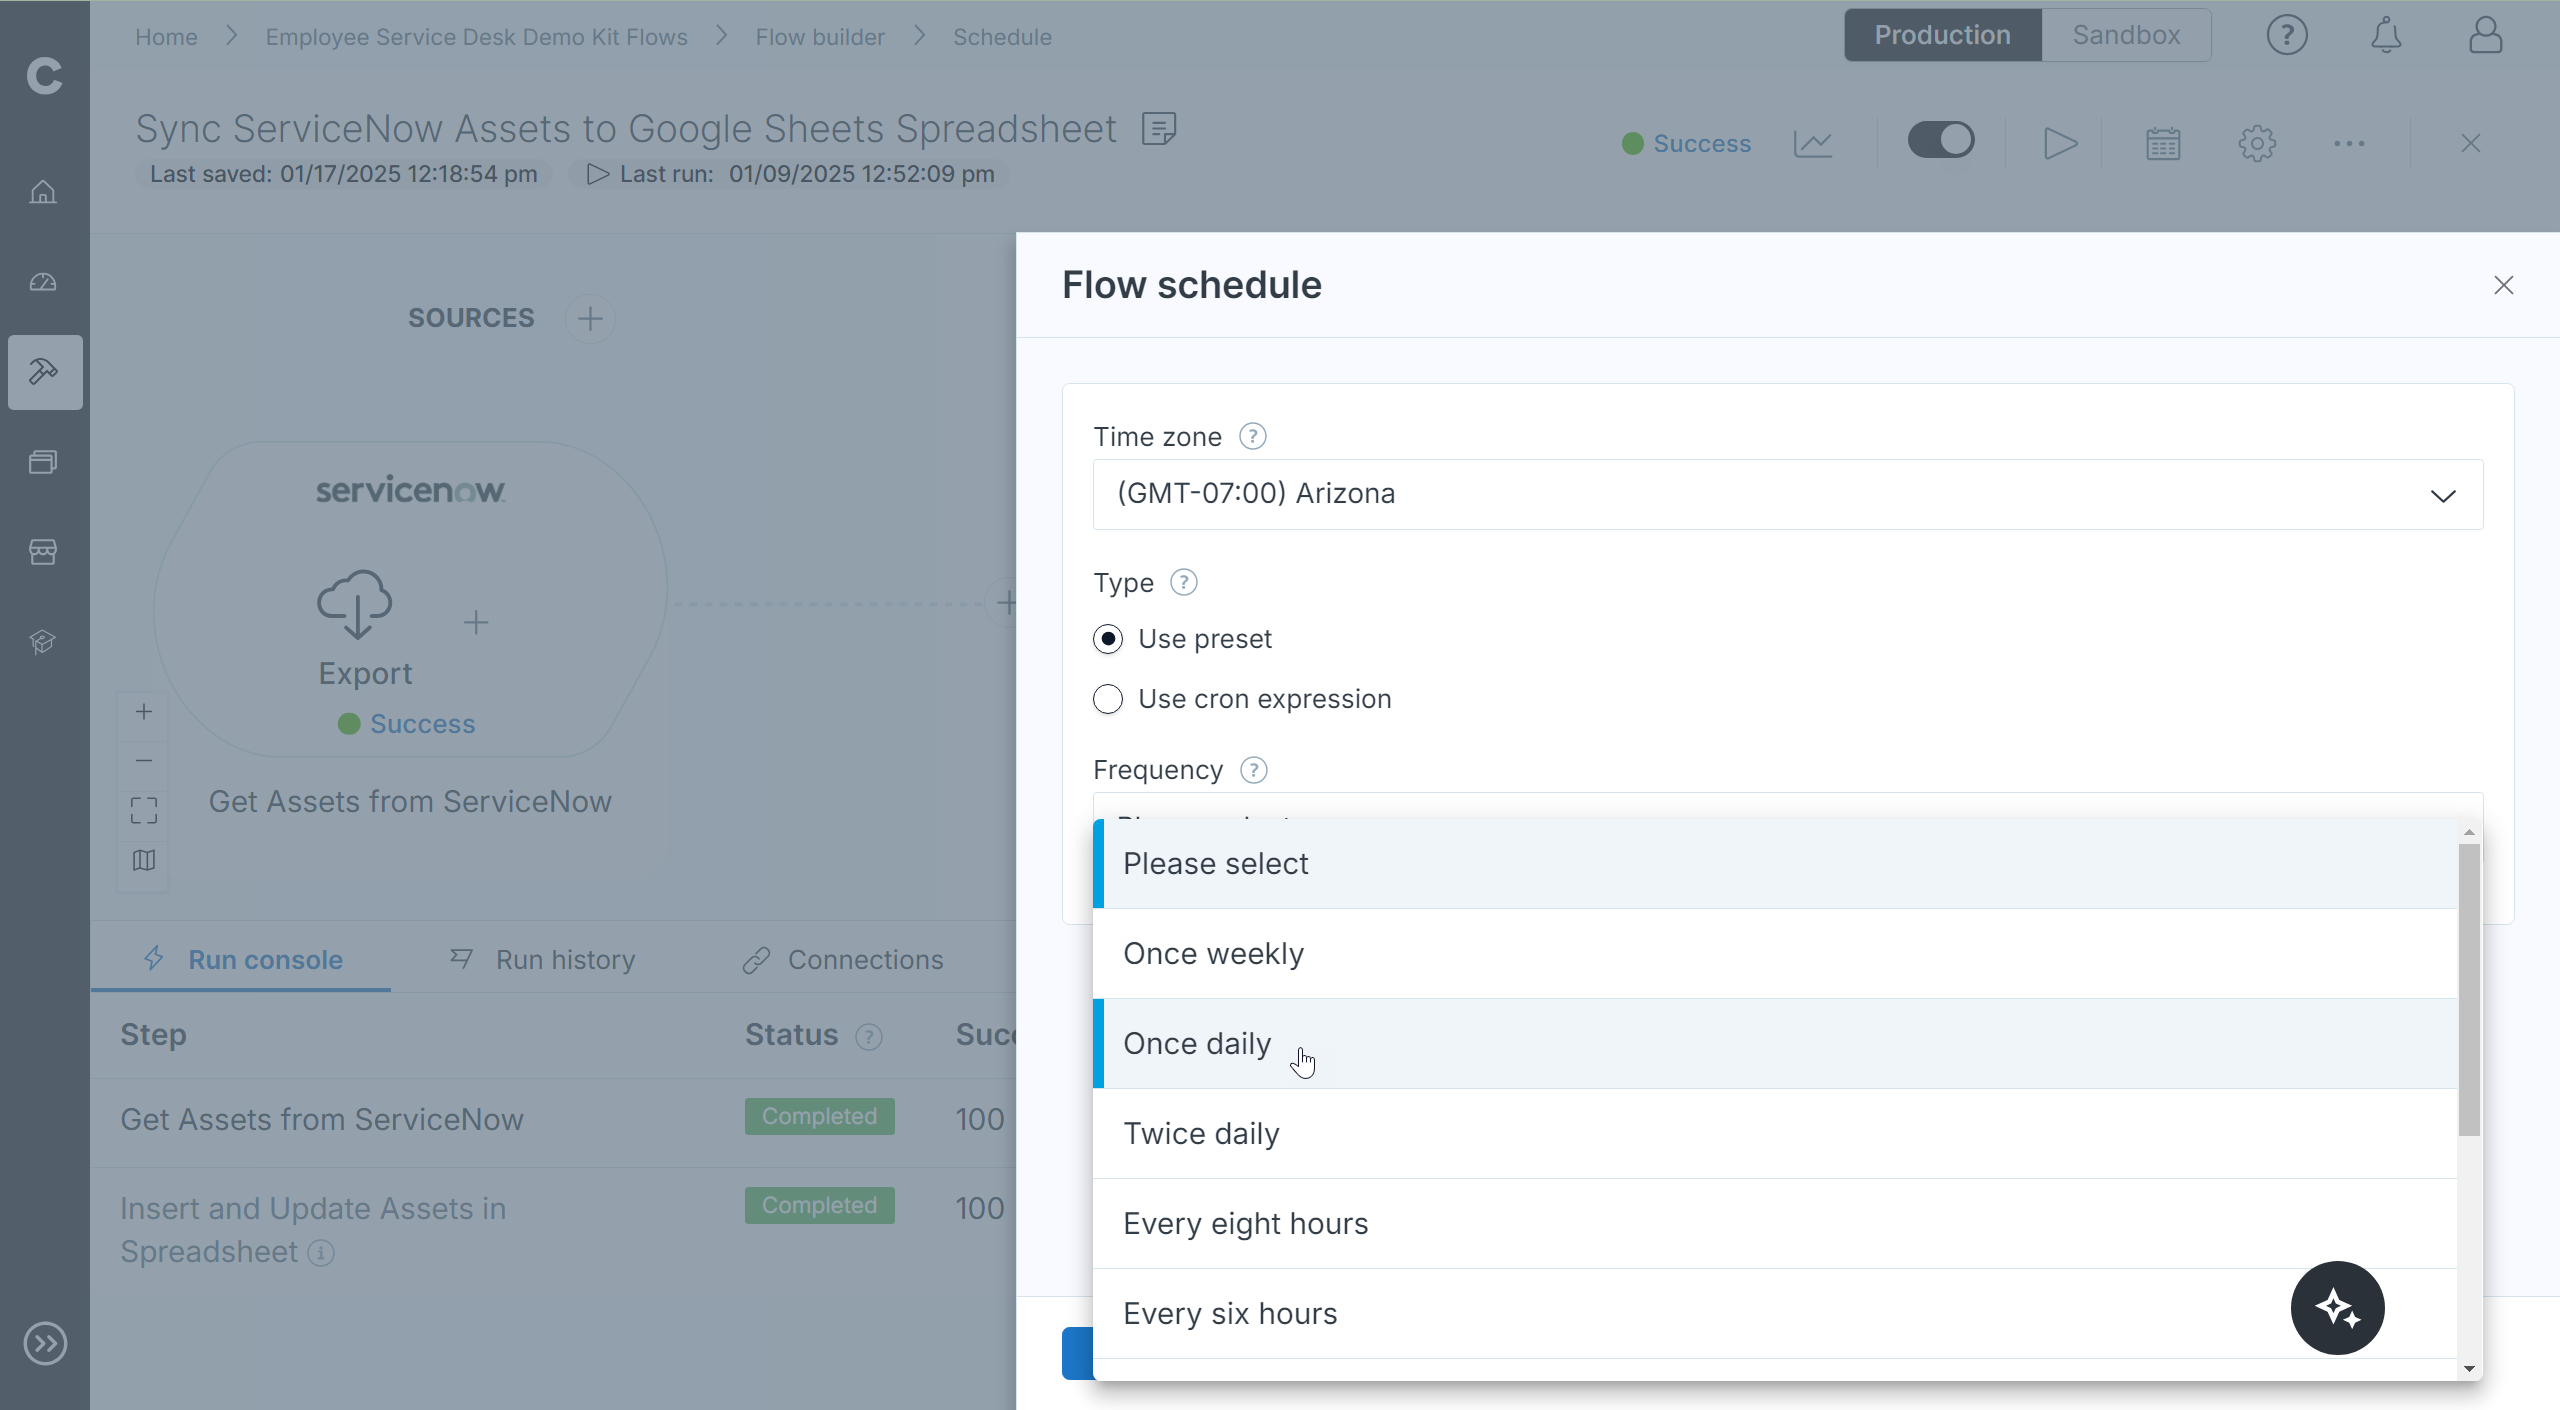
Finally, the schedule button can be used to automate the initiation of this flow. The calendar icon to the right of the run button allows you to specify with what frequency you’d like the flow to run. A dropdown offers a wide array of options but more specific intervals can be specified with cron expressions.
By syncing data between your systems like ServiceNow and Google Sheets, you can keep your tech inventory up-to-date, increase visibility, improve decision-making, and streamline provisioning—all while reducing manual effort.
Integration insights
Expand your knowledge on all things integration and automation. Discover expert guidance, tips, and best practices with these resources.